How to Monetize Your API and MCP Servers with FluxA and X402
If you’ve built MCP servers on, you’ve probably wondered: how do I actually make money from this? You’ve put in the work to create useful tools, but turning that into revenue usually means building billing infrastructure, managing subscriptions, and dealing with payment processing. It’s a whole separate project.
With FluxA, you can monetize your existing MCP server in about three minutes. No payment integration code. No subscription management. Just set a price per tool call, and start earning when AI agents use your server.
Here’s how it works.
What You Need
An API or MCP server running. For this walkthrough, we’re using a simple server built on n8n with two HTTP request tools: one that fetches news, and one that returns dividend information. Your server might do something completely different. The monetization process is the same.
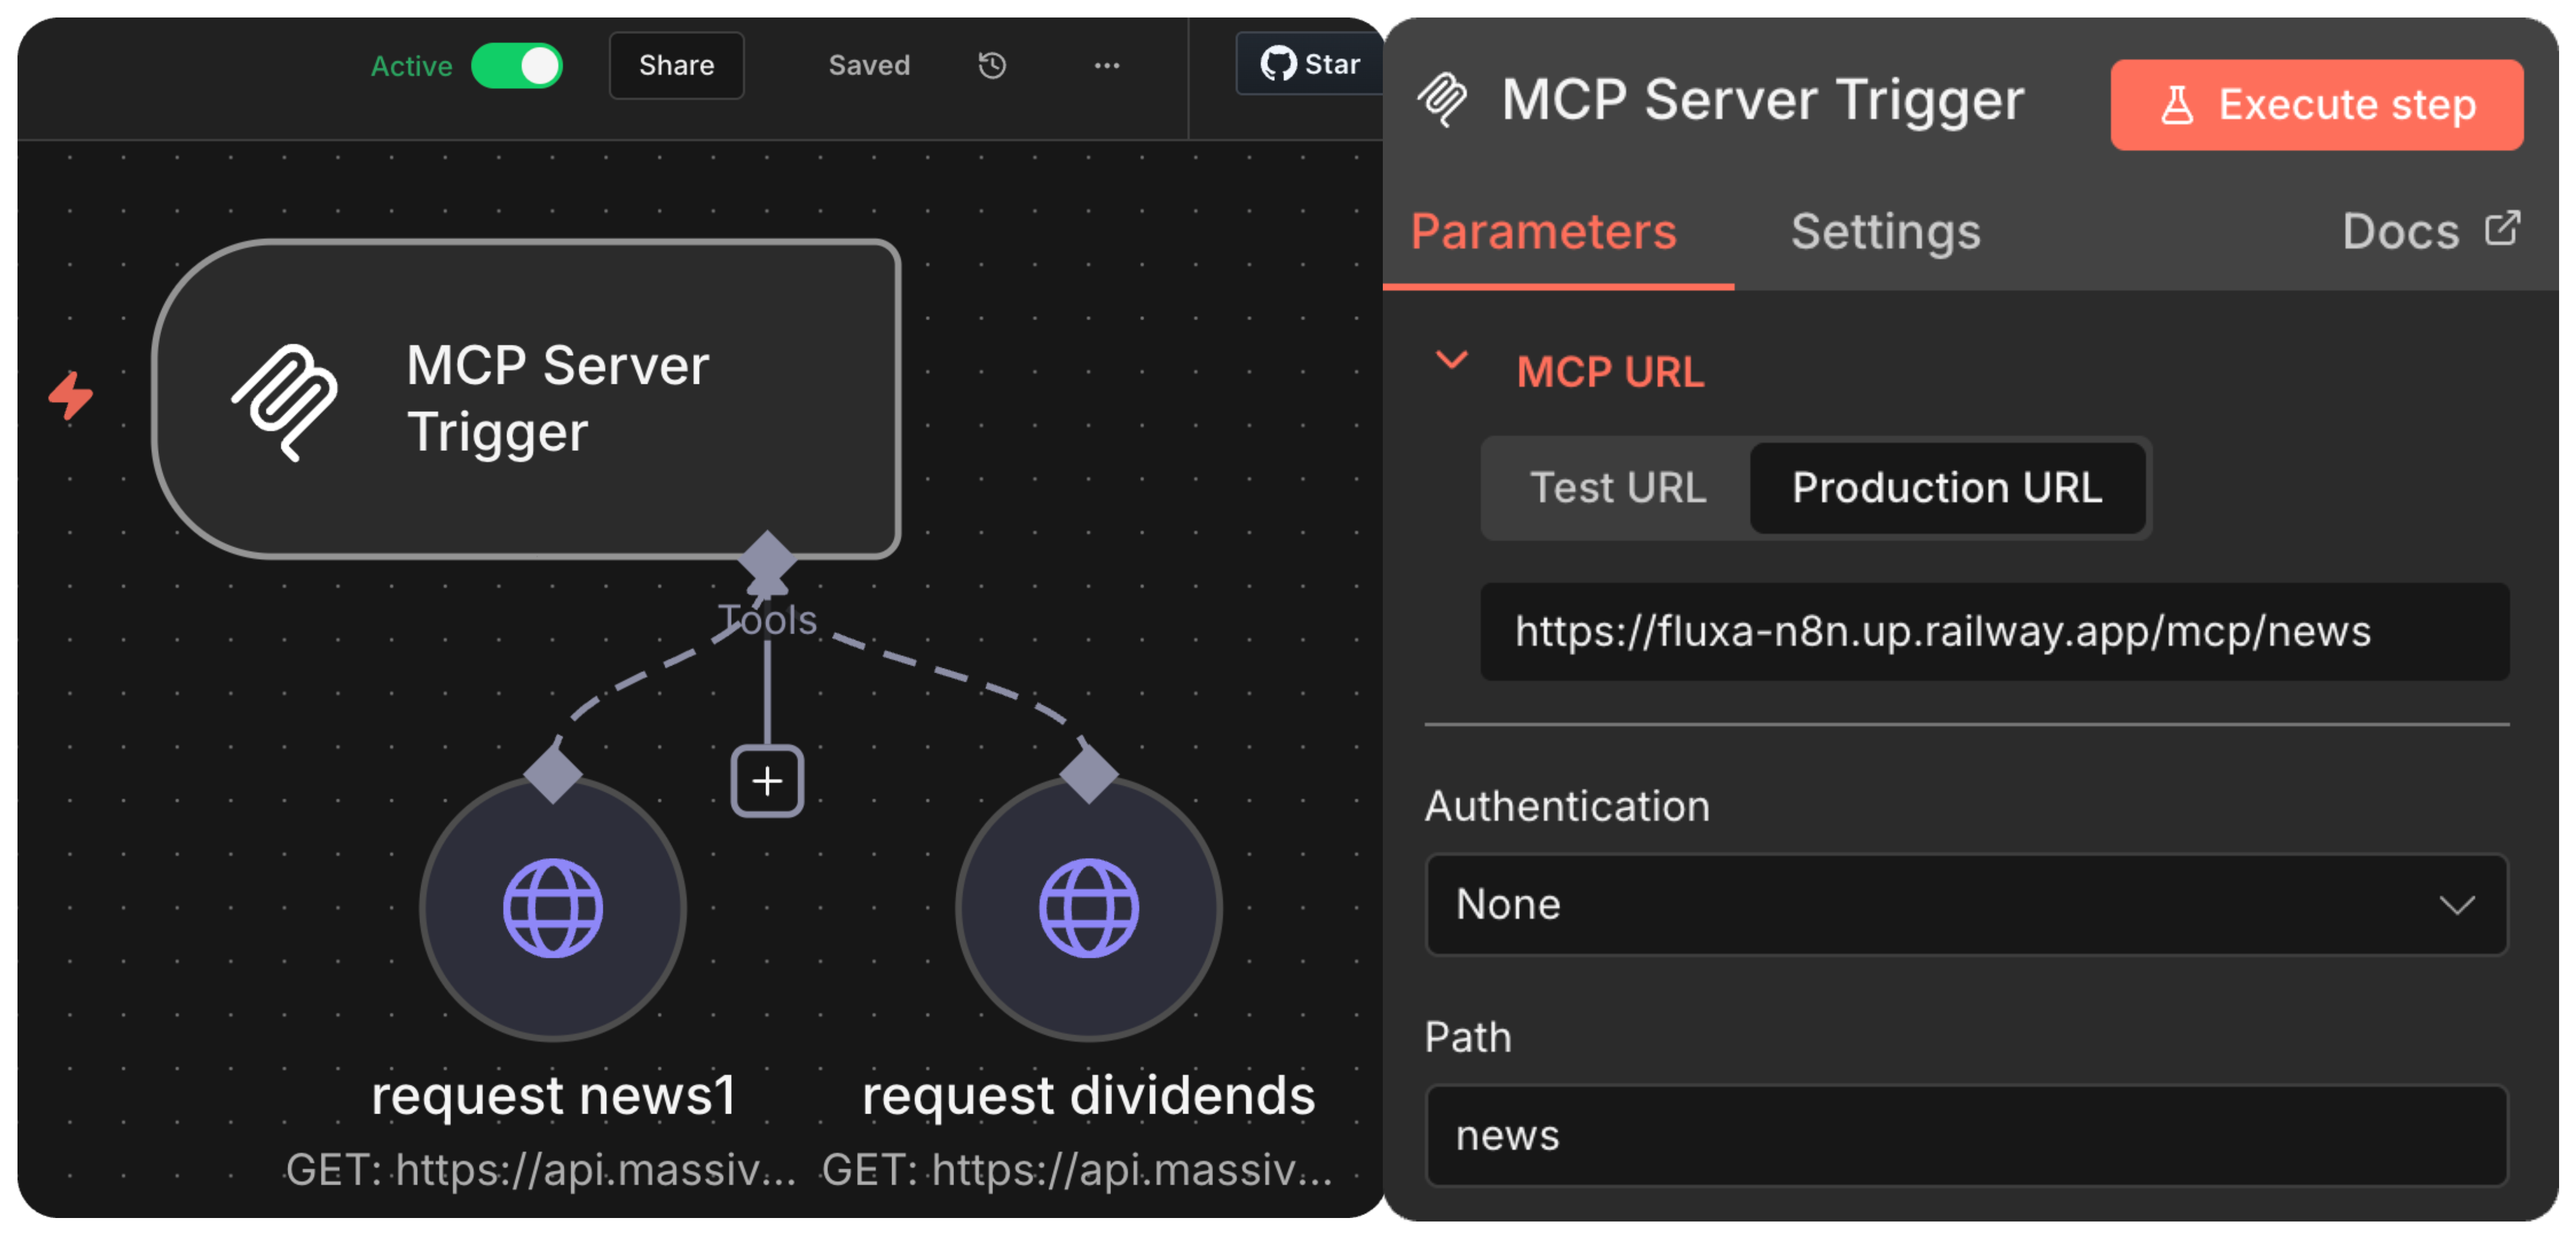
Before you start, make sure your n8n workflow is set to active. You’ll need the production URL for your MCP server trigger. Click on the URL to copy.
An active n8n server with two HTTP nodes.
Registering Your Server on FluxA
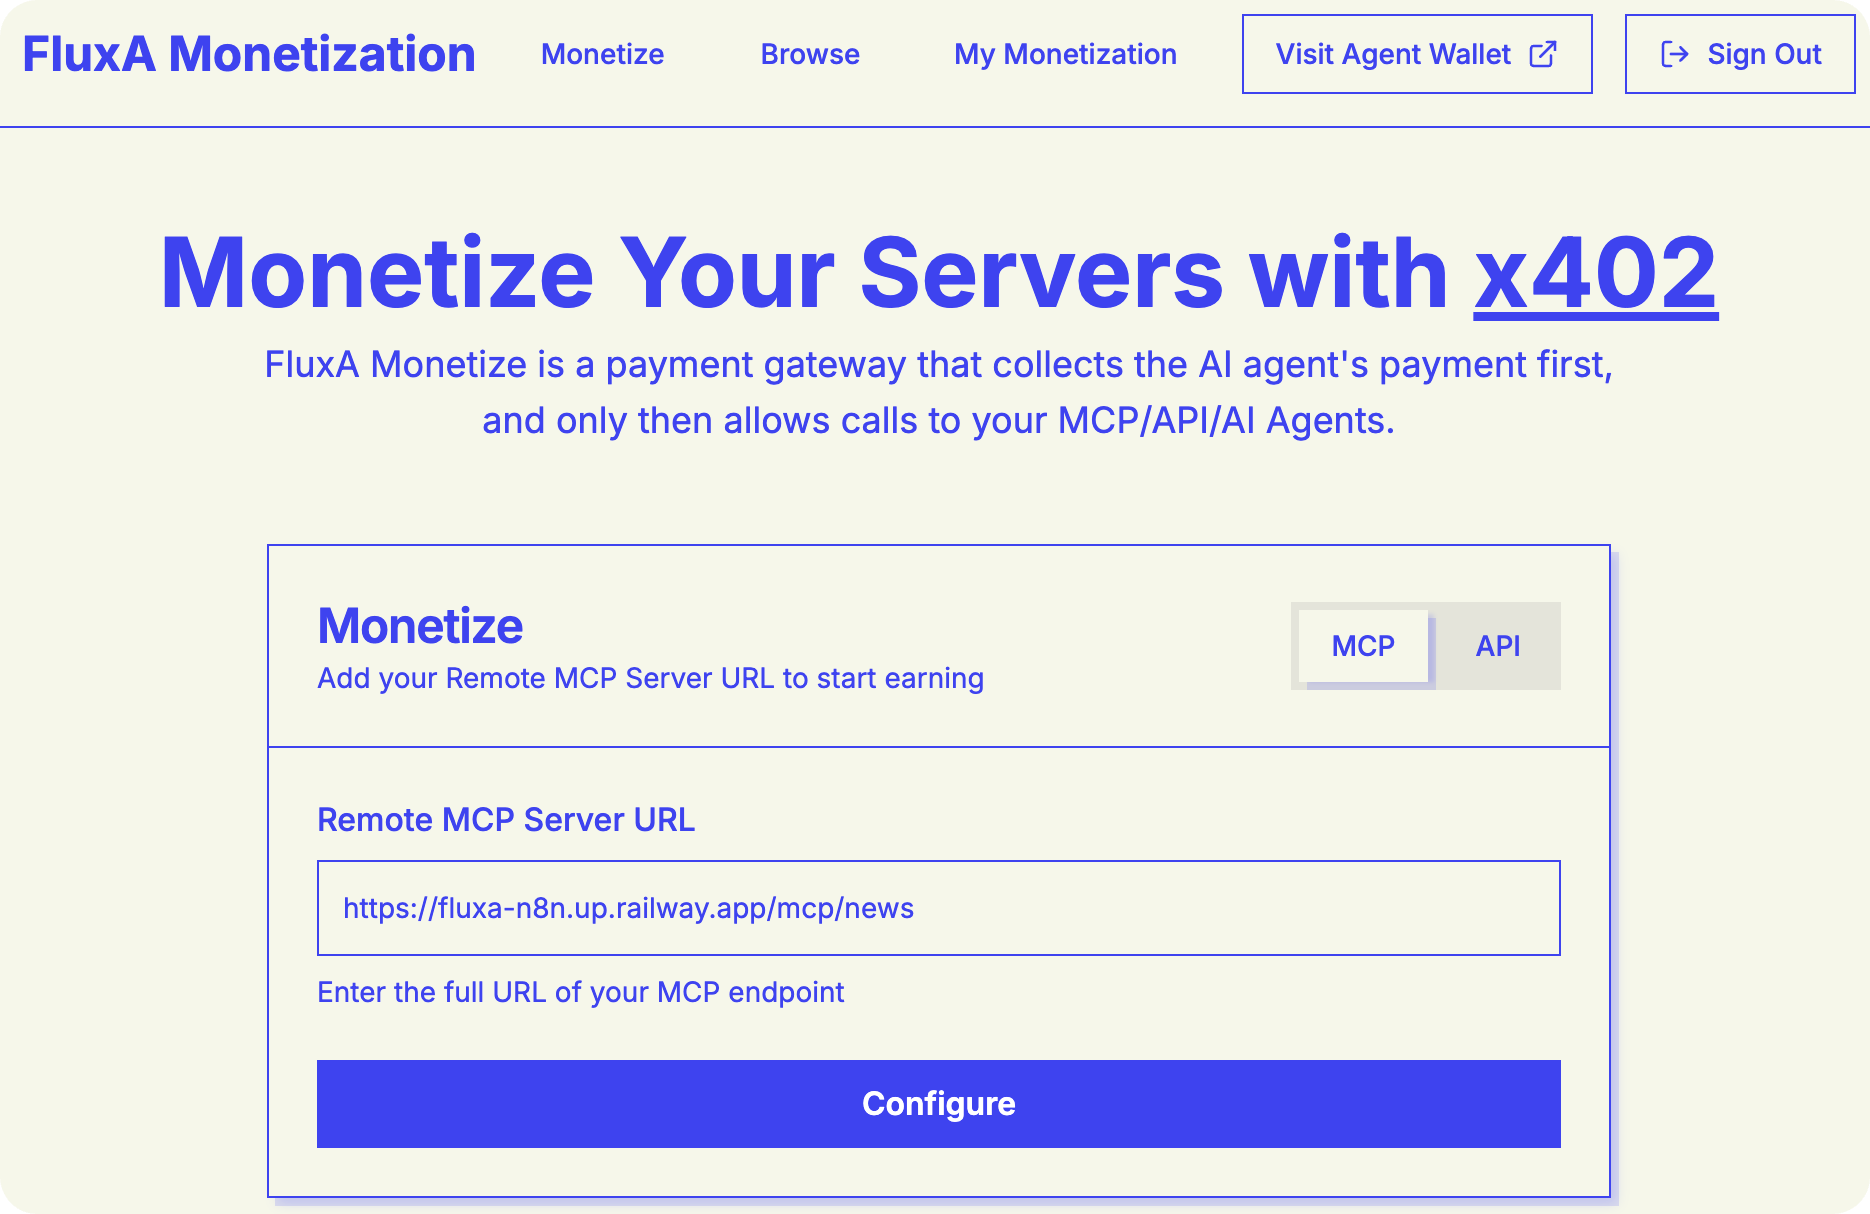
Head to the FluxA monetization platform and log in. Navigate to the MCP tab to start register and configure your server.
Paste your n8n production URL into the server field. FluxA will detect your available tools automatically
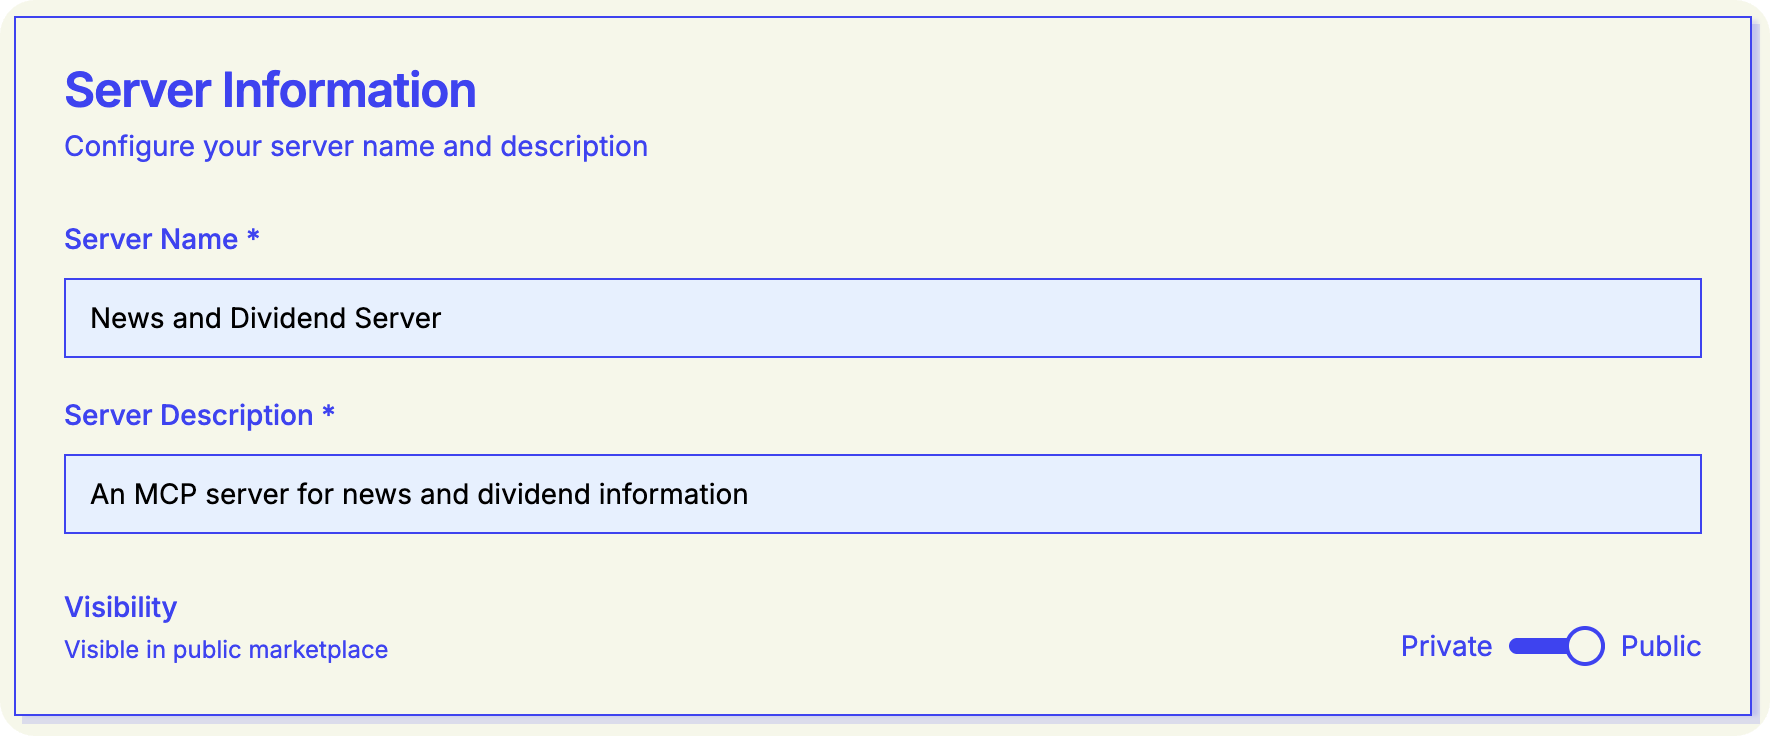
Fill in the basics:
- Server name: Something descriptive (e.g., “News server”)
- Server description: What your tools do
- Visibility: Set to public if you want other users to discover your server
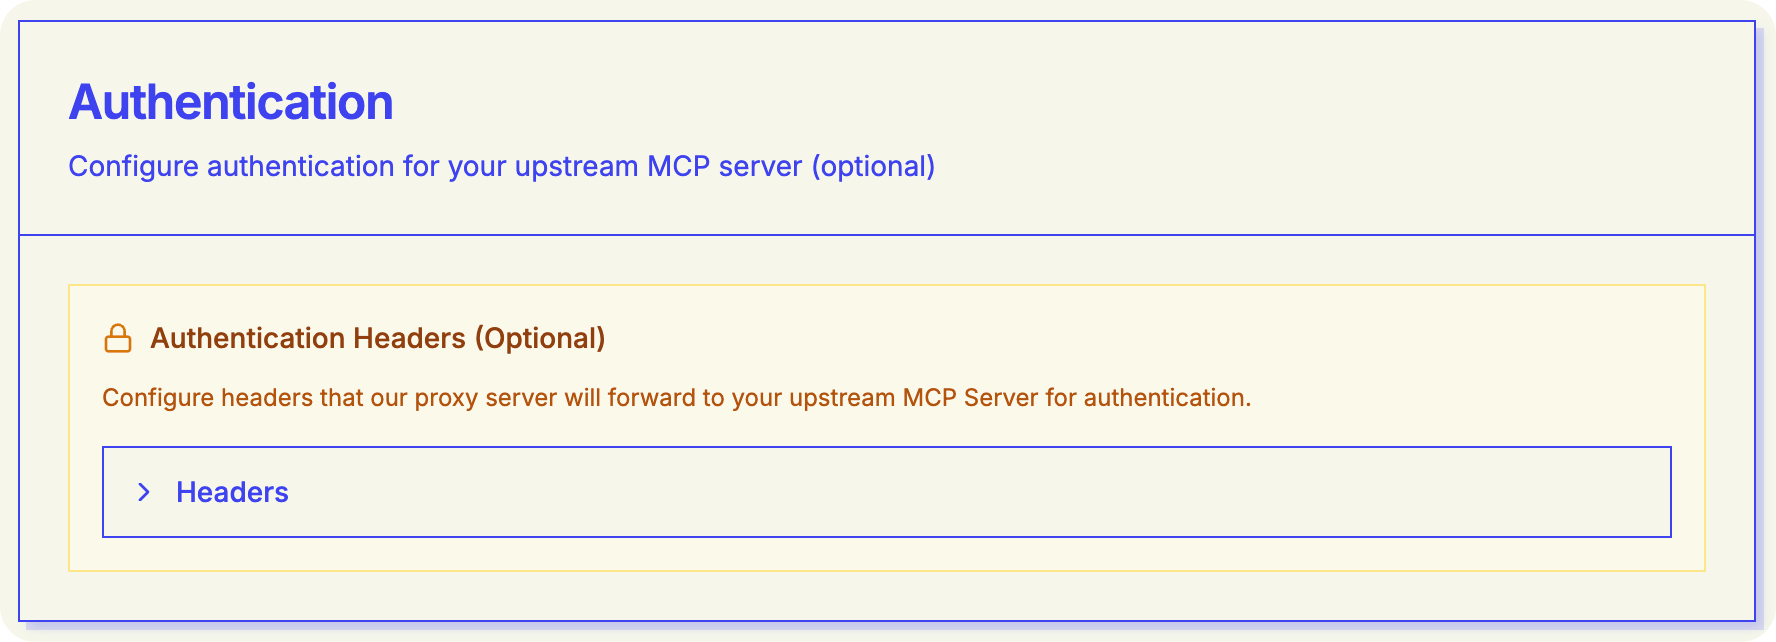
If your MCP server requires authentication, you can add your authentication headers here. These stay private—they’re used to access your server but never exposed to clients.
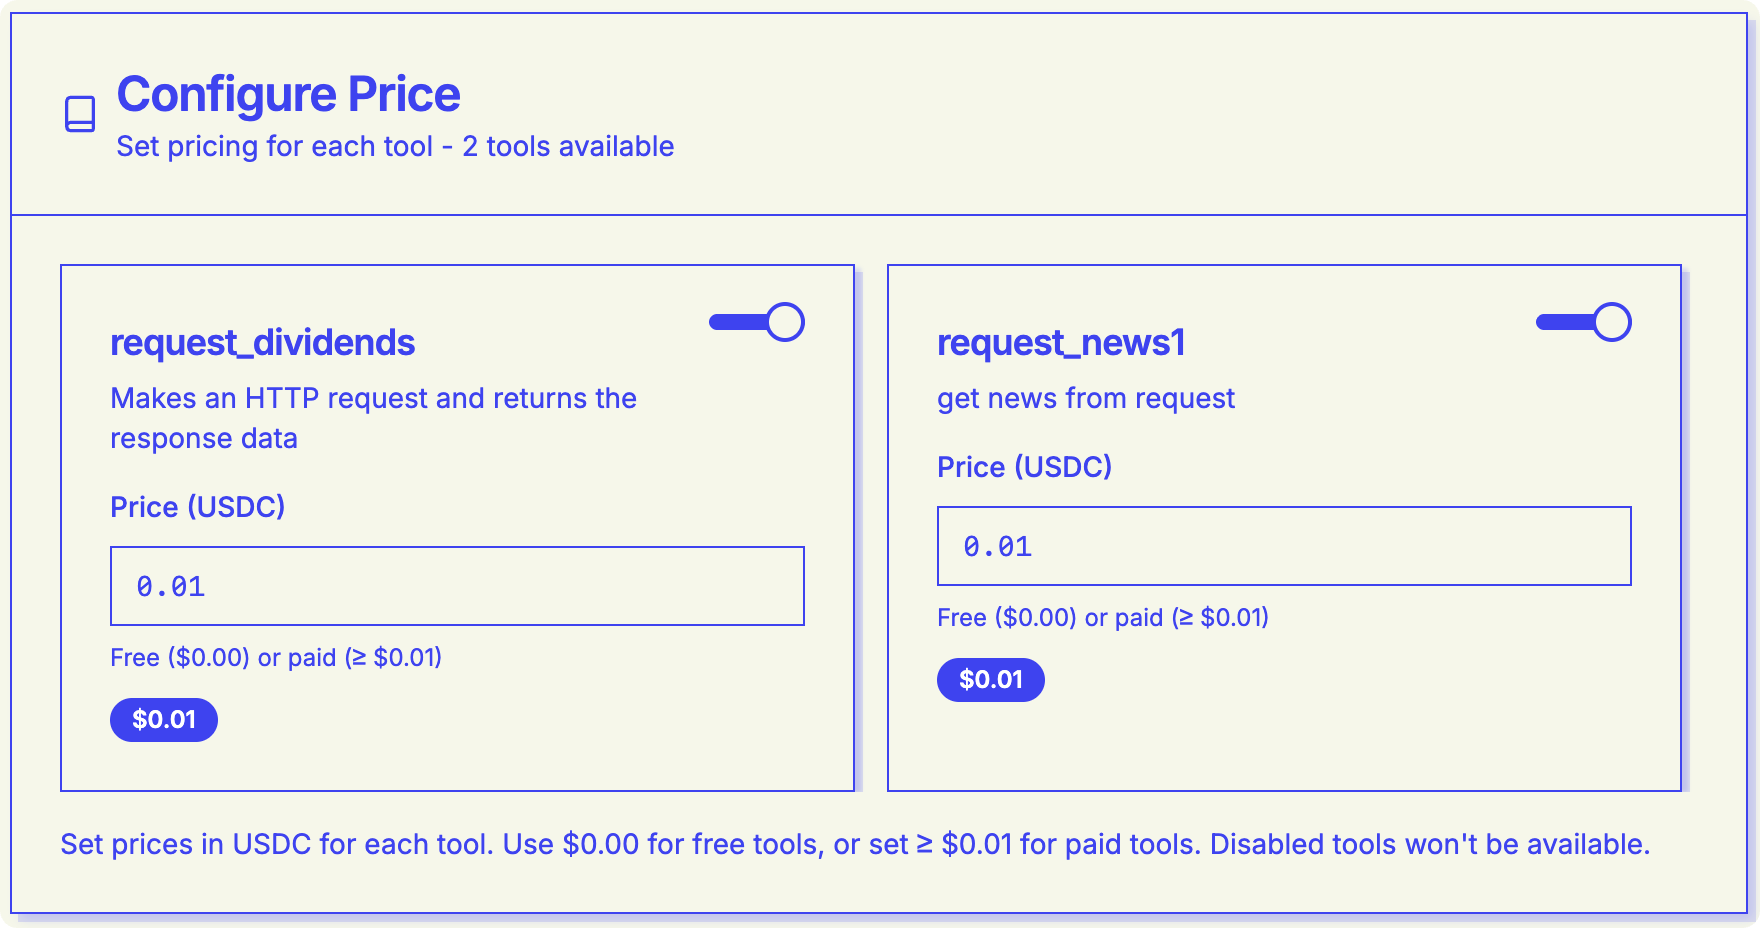
Setting Your Prices
This is where it gets interesting. FluxA shows you each tool your server exposes, and you can set individual prices for each one.
For our example server with two endpoints, we set each at $0.01 per call. You can price based on the value you’re providing, the computational cost, or the price that makes sense for your use case.
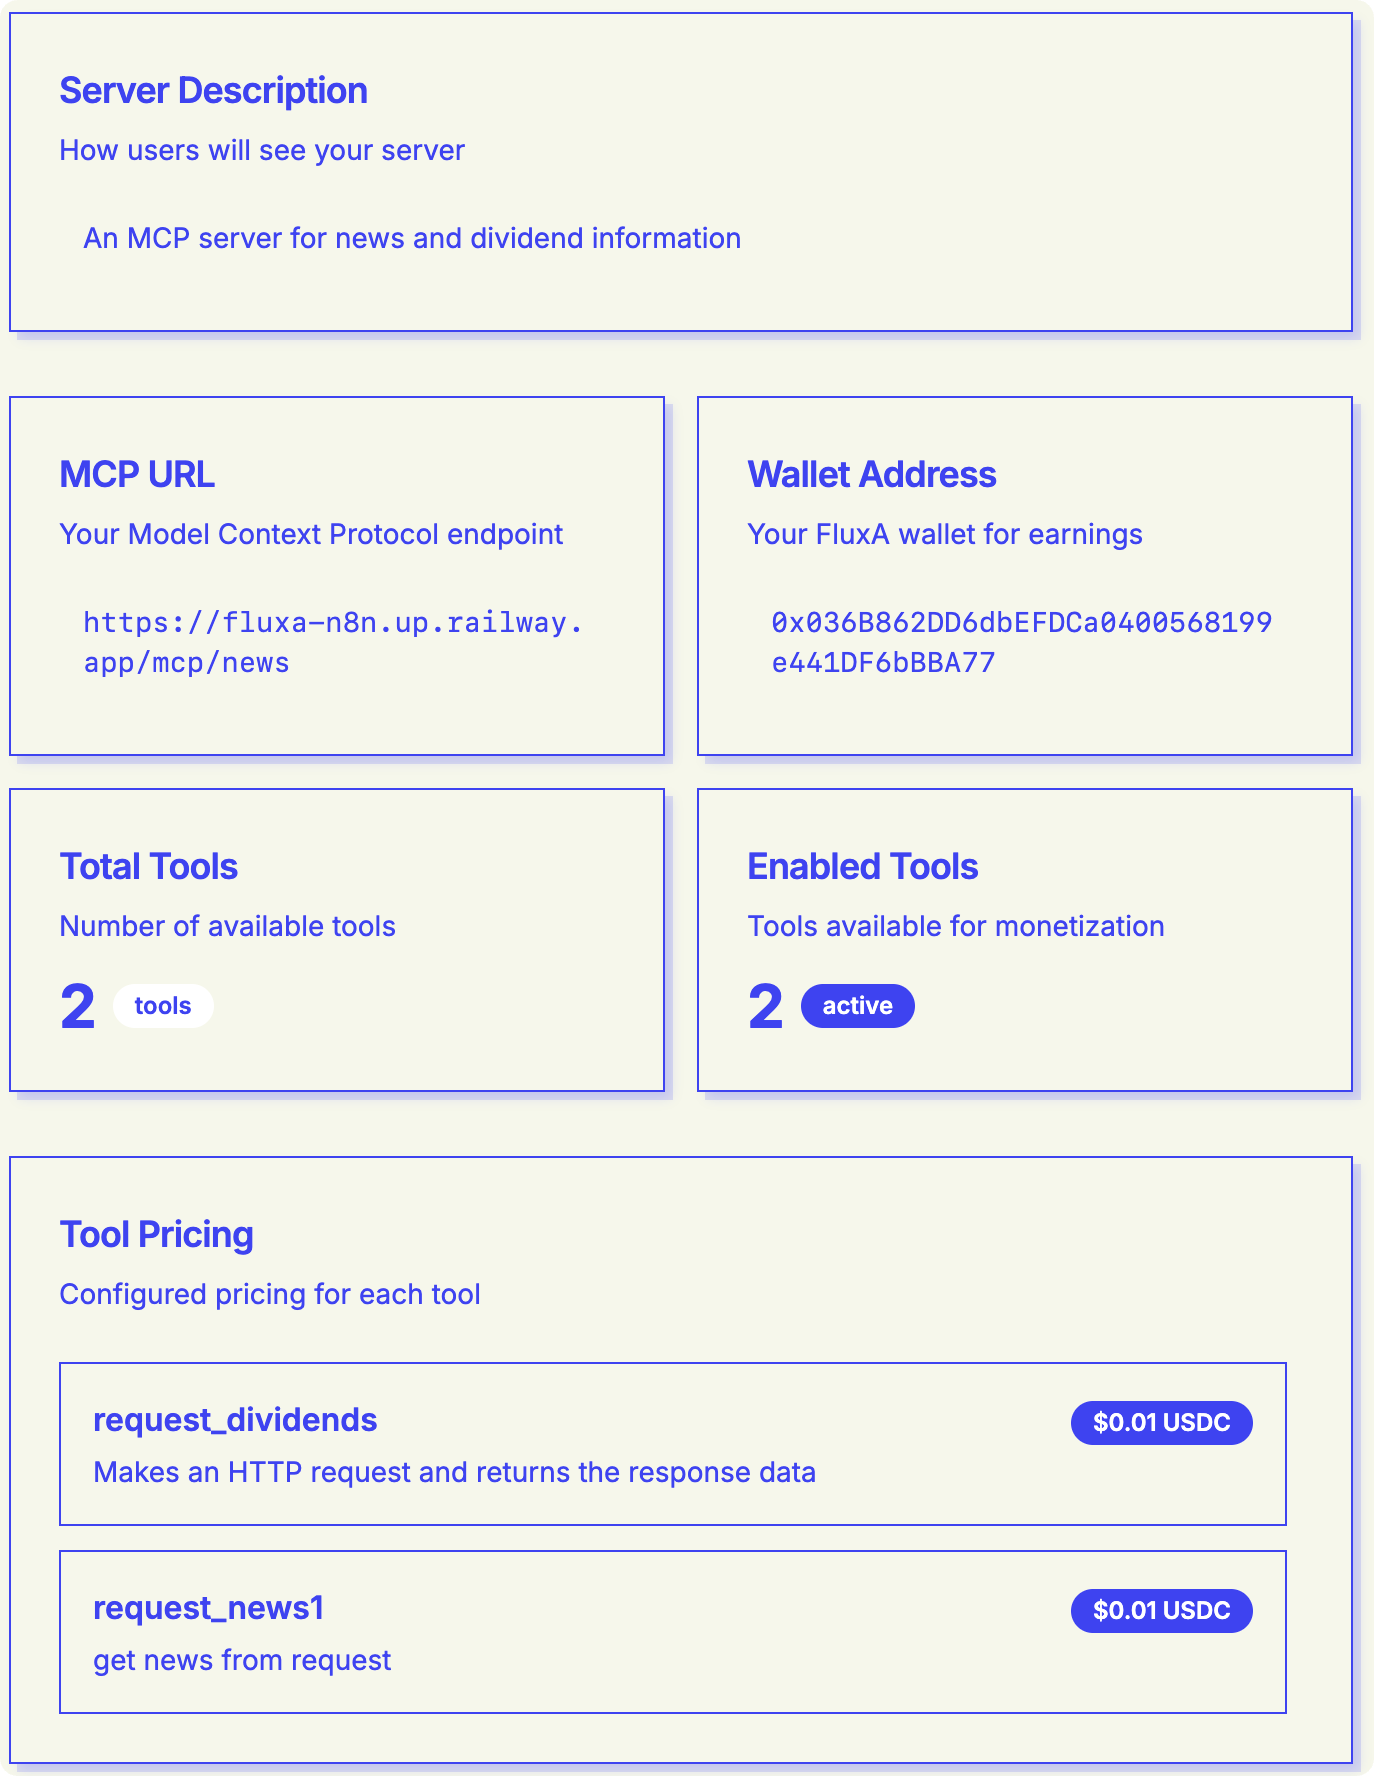
You can also disable specific tools if you don’t want to expose them through the monetized endpoint. Review your configuration: you’ll see a summary showing total tools and how many are enabled.
Hit “Review Configuration” to see the information of your monetization before publishing it to the public. Make sure all the information is correct.
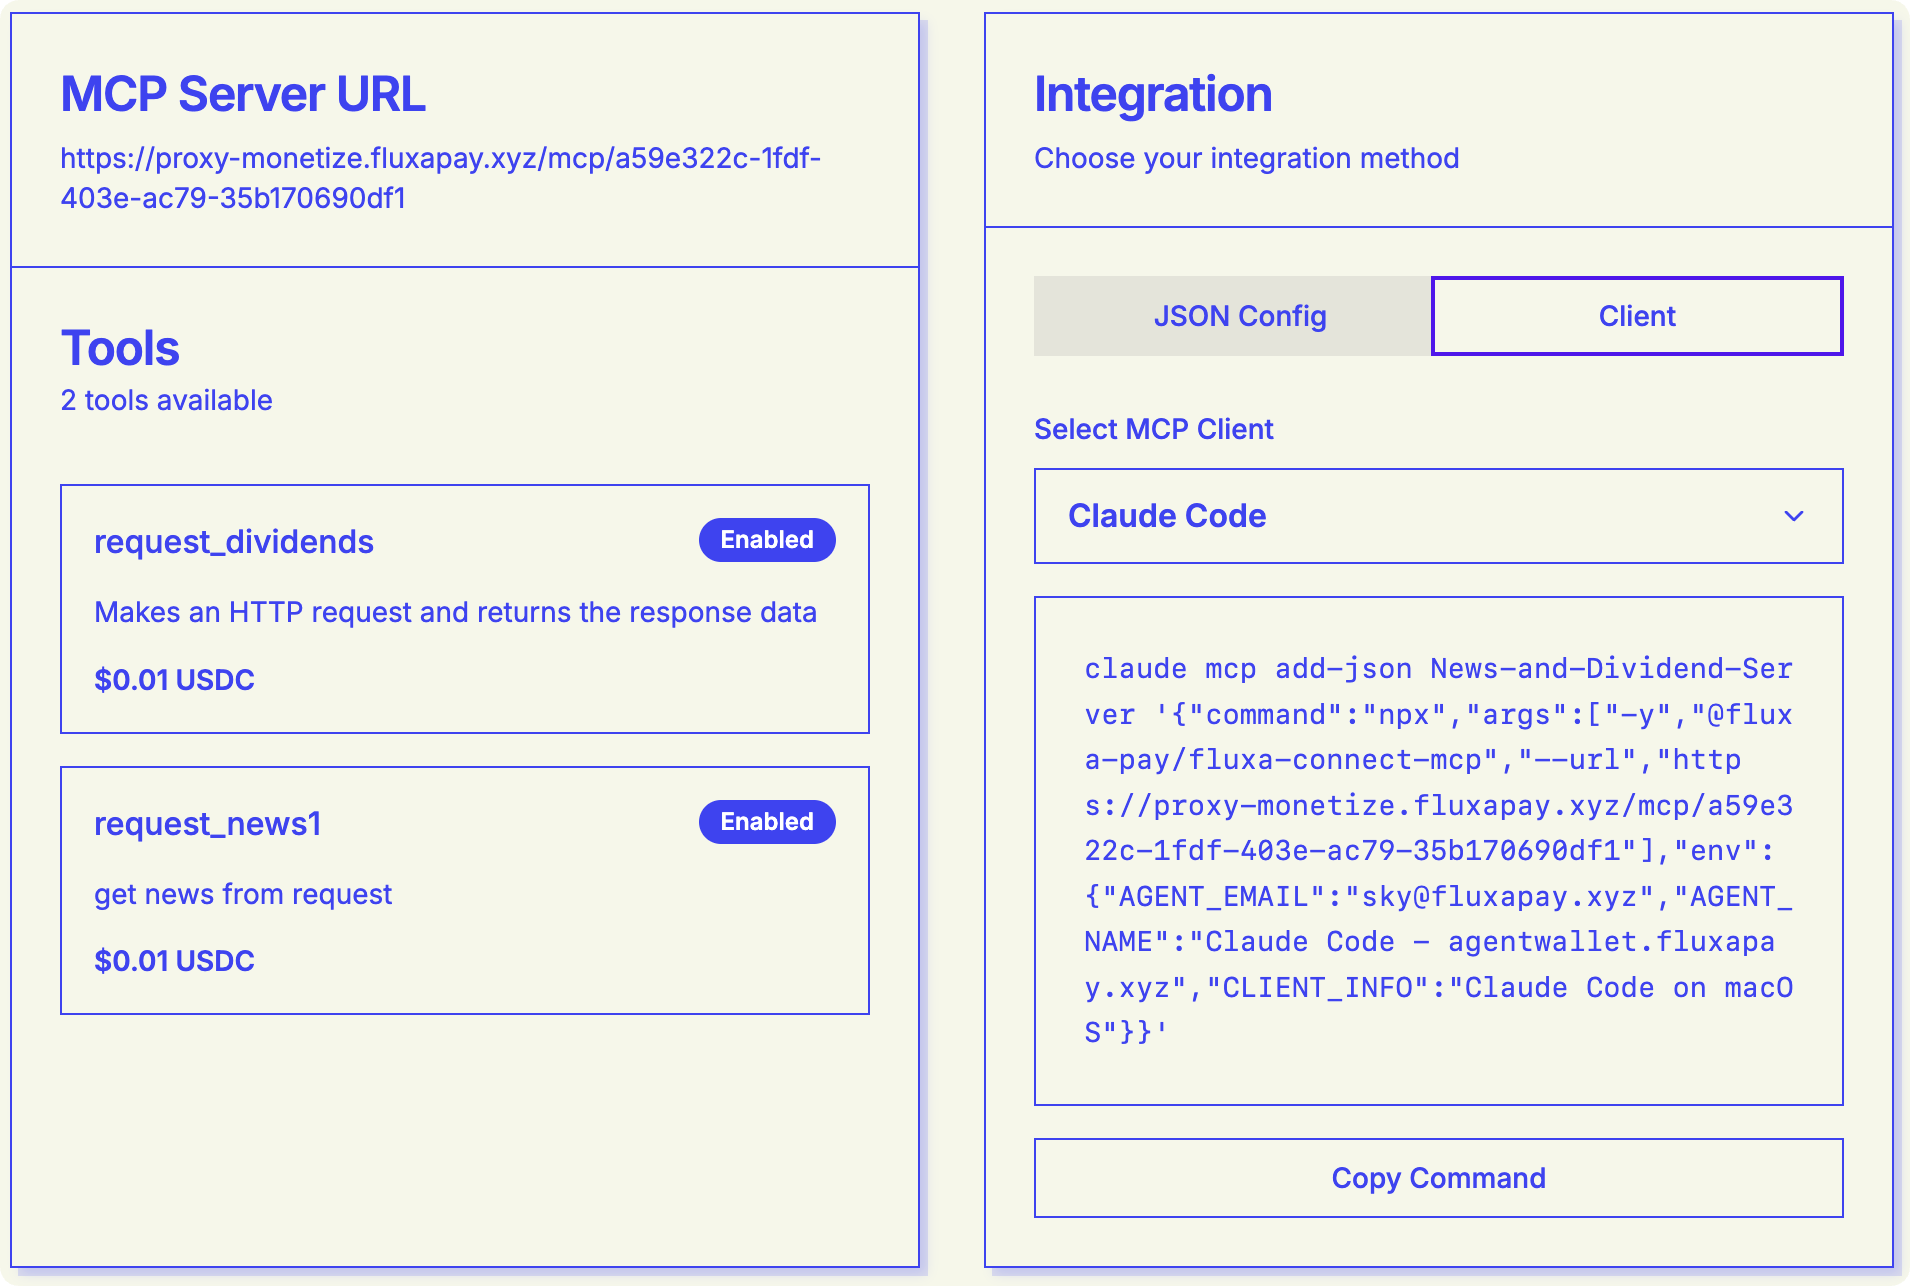
Integrating with AI Agents
After registration, FluxA gives you an integration page with two key pieces:
- A list of your monetized tools on the left
- Integration options on the right
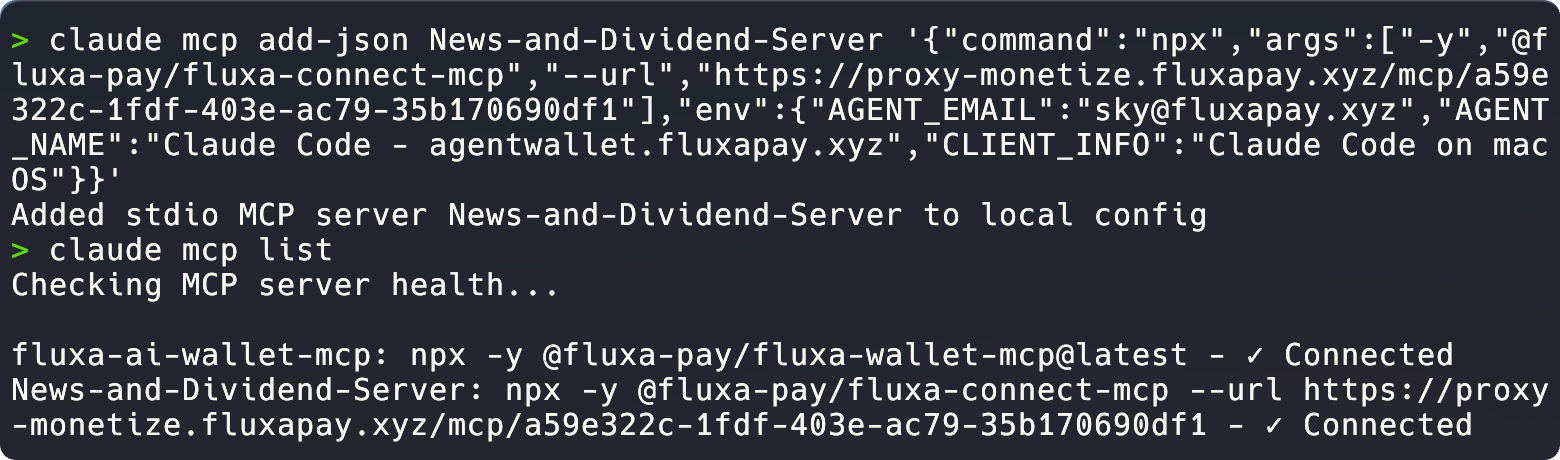
FluxA supports multiple integration methods. For this example, we’re using Claude Code—just copy the provided command and paste it into your terminal.
Run claude mcp list to verify the connection is healthy. You should see your server listed and connected.
Testing the Payment Flow
Now for the actual test. Ask Claude to use one of your tools—in our case, “get some news.”
The first time, you’ll need to authorize your agent. FluxA will prompt you to register and approve the agent identity. Once that’s done, the agent can make paid requests.

When Claude tries to fetch news, it will request payment approval. You’ll see the charge (in our case, one cent) and can set auto-approval rules:
- Per-request limit (e.g., 2 cents max per call)
- Daily limit (e.g., 10 cents)
- Monthly limit (e.g., $2)
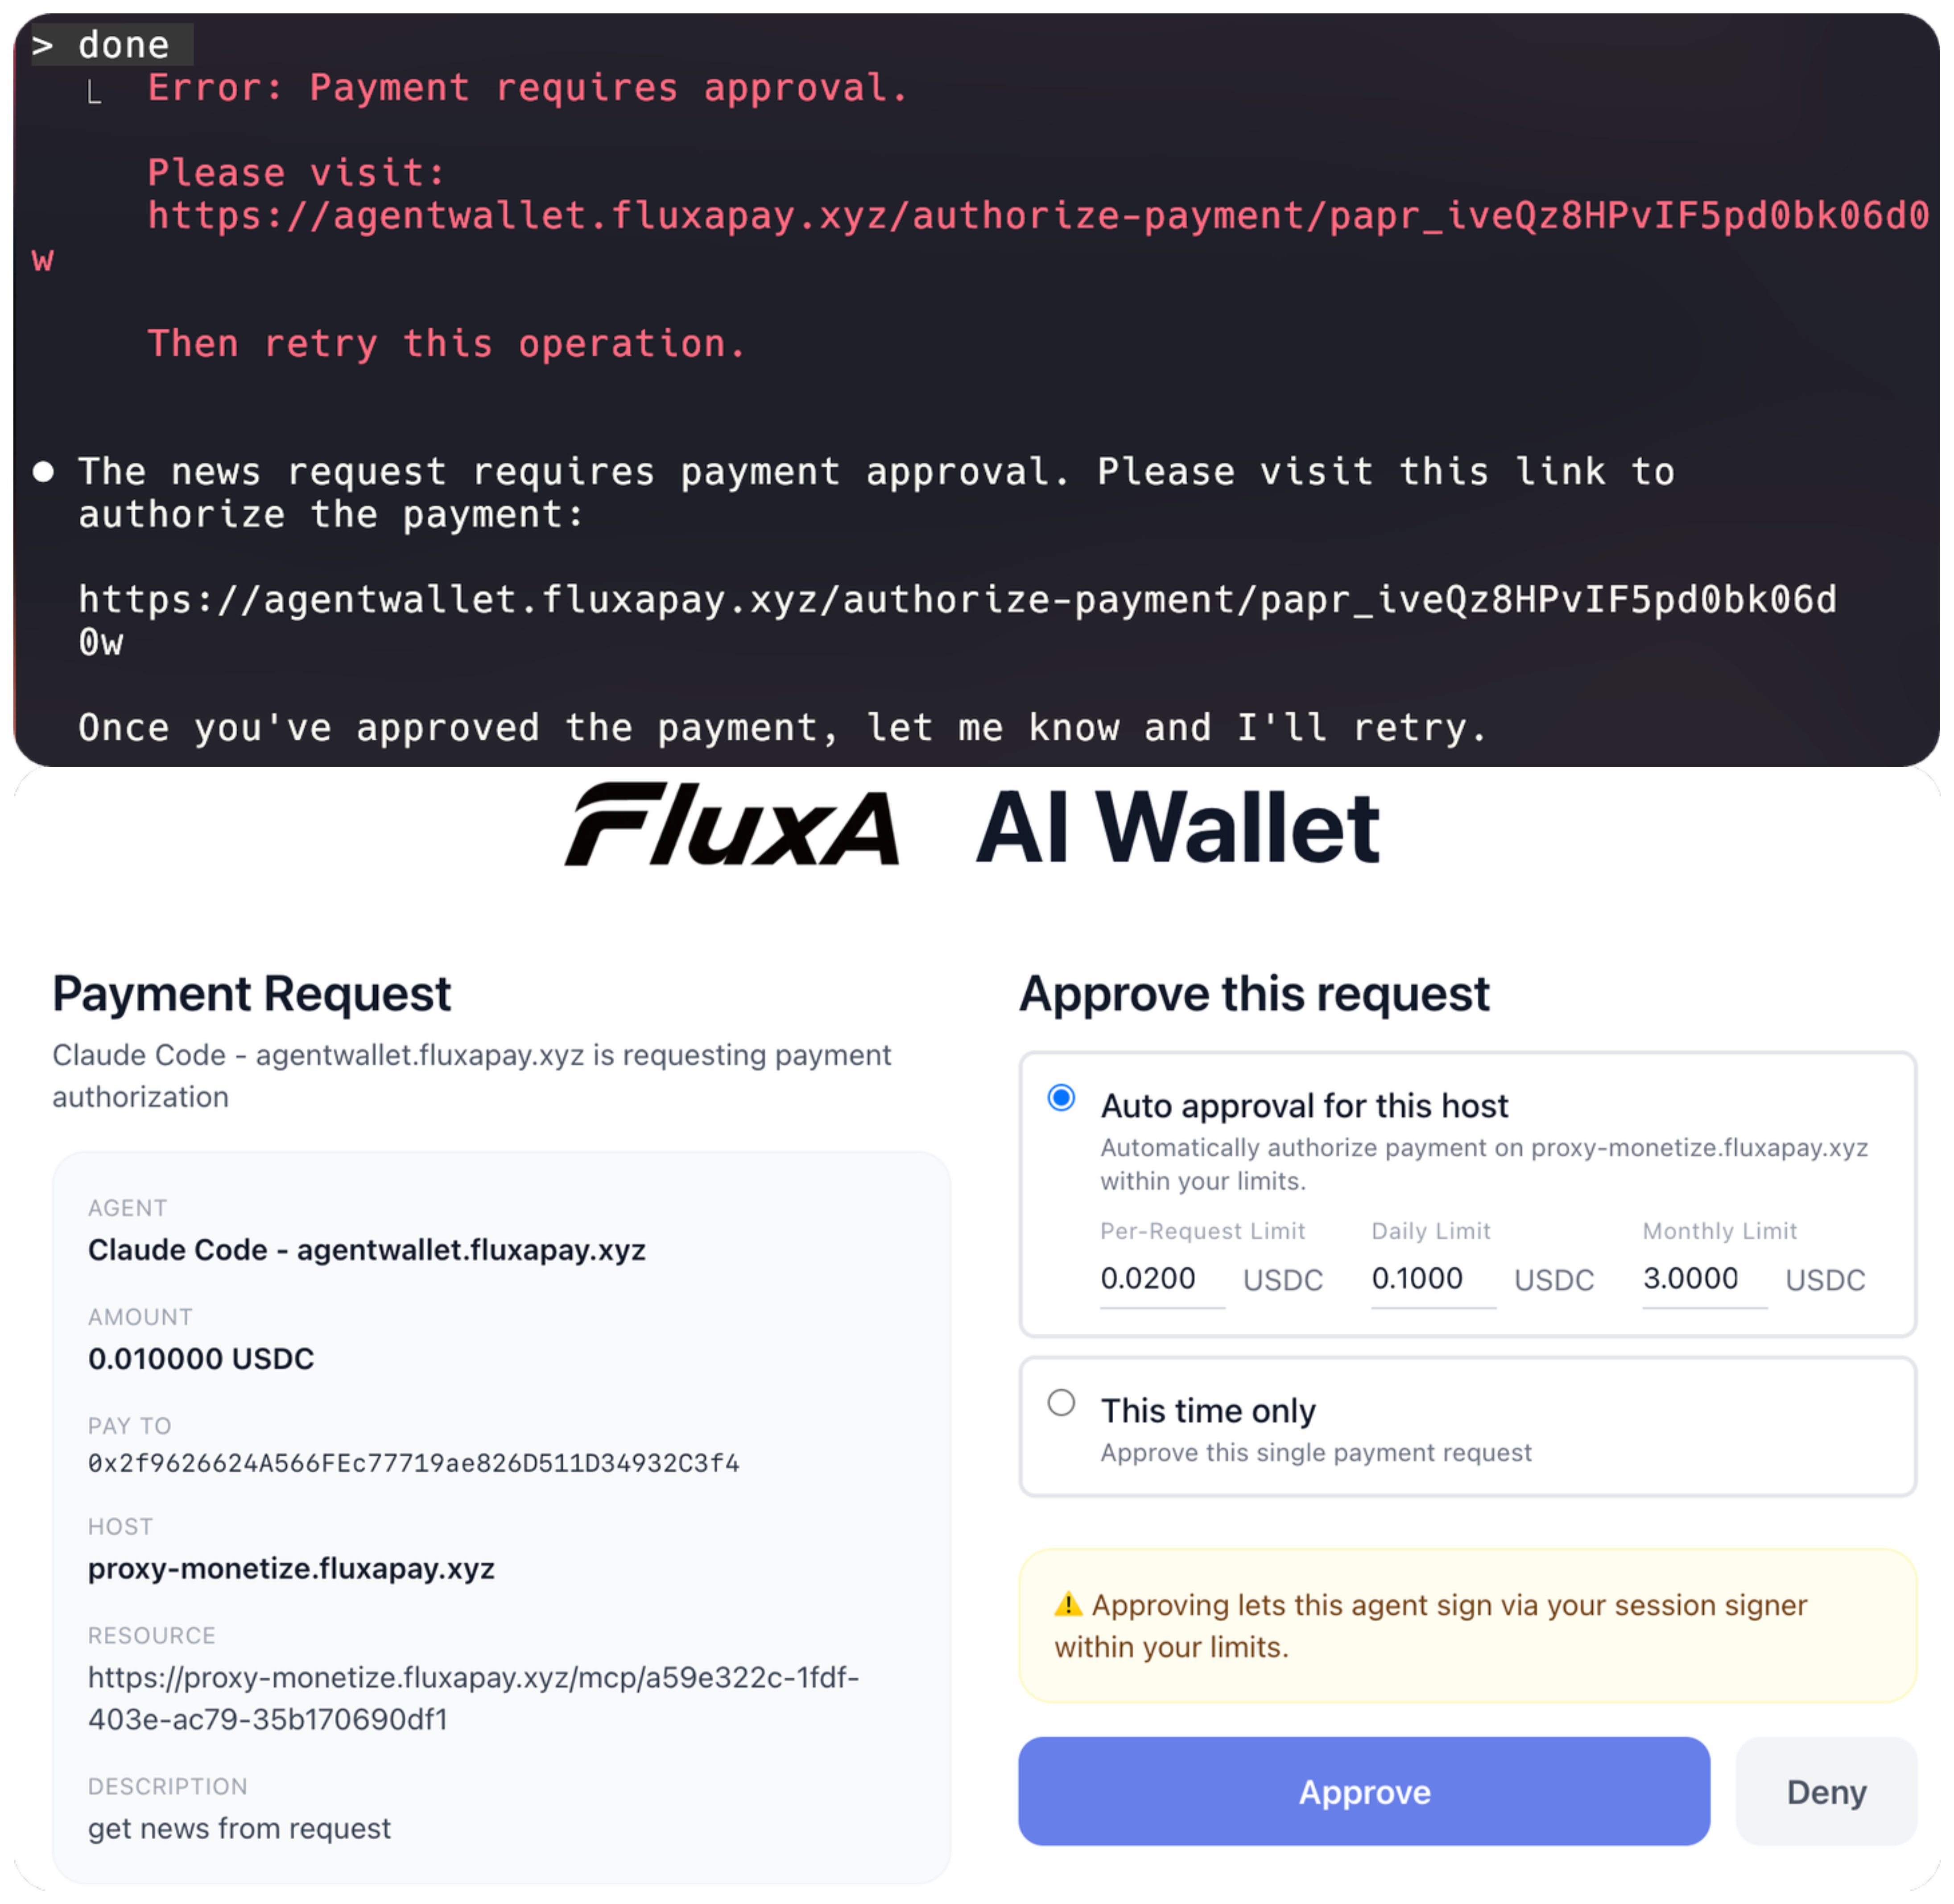
Once approved, the request completes and Claude returns the results—in this case, a summarization of the latest news including market updates and stock performance.

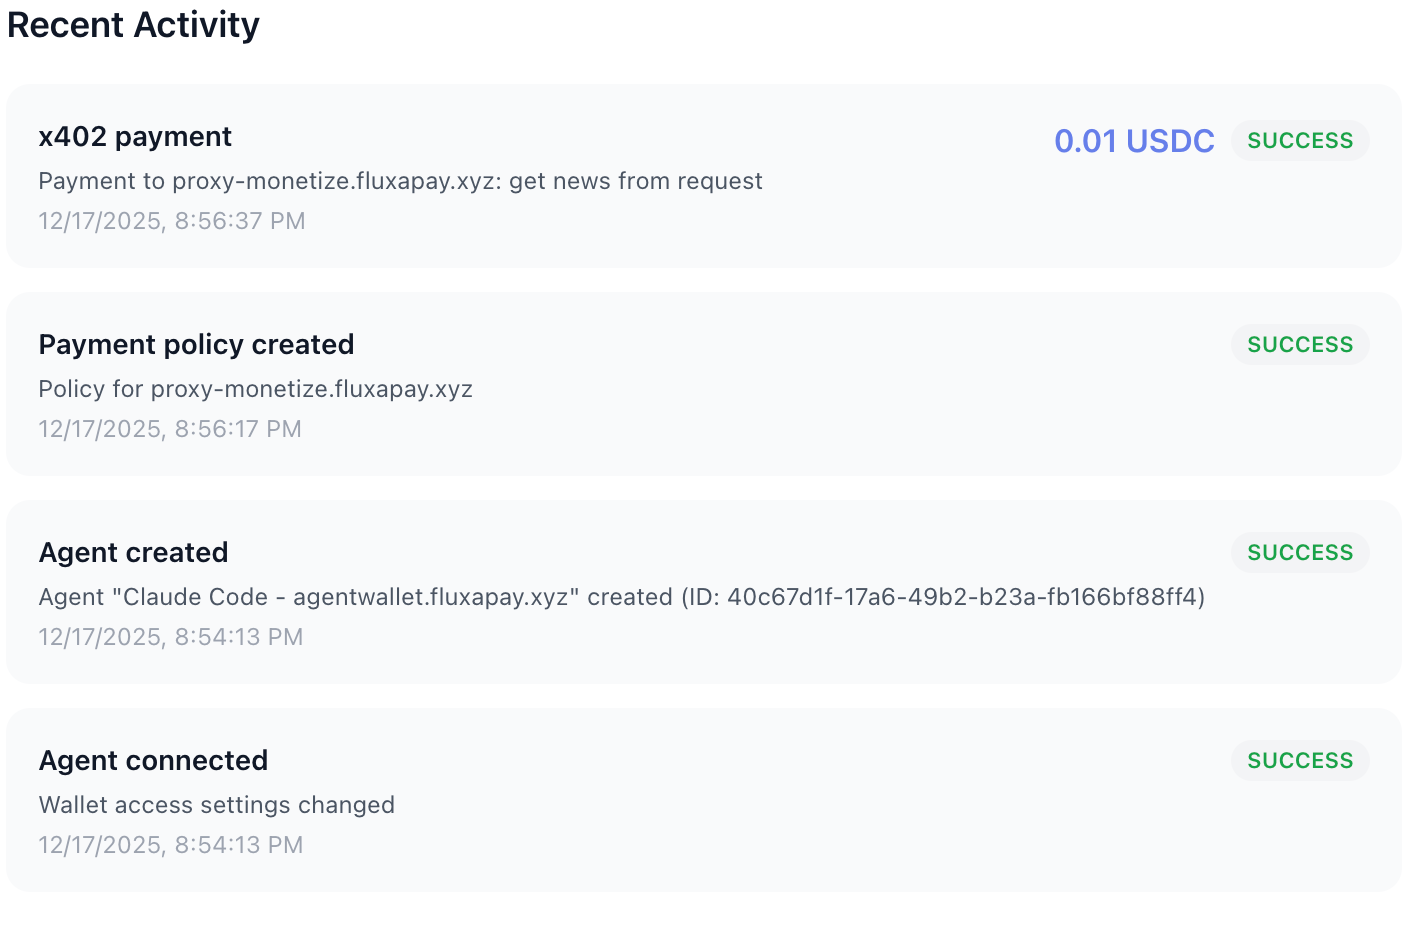
The payment will show up in your FluxA AI Wallet
What Just Happened
Your MCP server now earns revenue every time an AI agent uses it. The agent handles payment automatically through the x402 protocol. You didn’t write any billing code, and the user didn’t manually process a transaction. Payment happened as a natural part of the tool call.
This works for any MCP server, not just n8n. If you’ve built tools that AI agents find valuable, you can now capture that value directly in a “per use” fashion, at whatever granularity makes sense.
Ready to monetize your API and MCP servers? Get started at fluxapay.xyz
FAQ
How do I monetize my MCP server with FluxA?
Register your MCP server on the FluxA Monetize platform, set a price per tool call, and FluxA handles billing automatically via the x402 protocol. No payment integration code or subscription management is needed — setup takes about three minutes.
Do I need to write billing code to charge AI agents for tool usage?
No. FluxA handles all payment processing through x402. You set prices per tool, and when an AI agent calls your tool, payment happens automatically as part of the tool call. You never write billing code.
What pricing models does FluxA Monetize support?
FluxA lets you set individual per-call prices for each tool your server exposes. You can price based on value delivered, computational cost, or market positioning. You can also disable specific tools from monetization.
How do AI agents authorize and pay for tool calls?
When an agent first uses a paid tool, it registers with FluxA and requests payment authorization. The user approves and can set spending policies — per-request limits, daily caps, and monthly limits. After approval, subsequent payments happen automatically.
Which AI agent platforms integrate with FluxA Monetize?
FluxA provides integration options for Claude Code, Claude Desktop, Cursor, and other MCP-compatible platforms. After registering your server, FluxA gives you a ready-to-use integration command.